Quilts for Sale

Tuesday, June 25, 2013

Scrappy Compositions


jill here.... Last Sunday we had our DSM Modern Quilt Guild Show reception here in Ames.  The venue was a perfect setting to display our quilts.  It was well attended and the audience asked great questions concerning the modern movement.  We'll share some photographs next week so stay tuned!

Seems like lately I have lots of small scraps! They are frequently trims from strip piecing in a variety of combinations.  Surely they must be good for something!  Perhaps they could be reconstructed into little designs for greeting and gift cards.  So working quickly (not over thinking), I gathered some supplies and fabric strips and began cutting.


I picked up some packages of cards/envelopes (4 X 5.5")
along with some 2.5 X 3.5" card stock called
"Artist Trading Cards", perfect for gift tags.
If you use these, everyone will think you're an artist!

I had a hard time getting through the paper isles; it could easily become another addiction. Fortunately, I was limited by time and overwhelmed by all the choices!


So I stared with three scrap sets .... ends of strip sets.
I chose three different ones that contrasted with one another,
varied in pattern and intensity

Not wanting to create bulk,  I placed a cut directly on top
of another  fabric with about a 1/2" overlap and stitched
close to the edge with a contrasting thread.


A second strip was placed under the overlap.

This small piece was stitched all the way around
with a scant 1/4" topstitch.

A section was trimmed to reflect an interesting pattern.


Additional strips were added, the composition  squared up
and stitching added  for line interest.  The diagonal
lines create more active movement.


Scraps having scraps...no control to the numbers!


Layering and sewing....


More layers and diagonal movement added.


I used a spray adhesive to keep the fabric
in place while I stitched it down to the card.

The fabric was stitched  around the perimeter  a
scant 1/4" away from the outer edge.
I left more border at the top to allow
for a hole punch to tie the "artist's" tag to the gift!


Trying another combination with just two fabric sets....


I alternated the sets but staggered them for more interest.


This composition appears to be more traditional...

......sized to fit on a card.

Cut at an angle  to make it more interesting!


Fabric collage sewn to card with a scant 1/4" from the outer edge.


Triptych of 1" collage strips sewn to card.


Perhaps if the sewing machine will fit in the car, my daughter and daughter-in-law would like to make this a vacation project!  I'll hold the babies (tough job).

'till next Tuesday...

Tuesday, June 18, 2013

DMMQG Quilt Show 2013

The DMMQG show is hung and waiting for an audience!  If you are nearby, please take a look.
Doesn't this postcard draw you in?  

The particulars are all included here on the card.  Basically June 17- July 25 at 1015 Hyland Avenue in Ames at the Unitarian Universalist Fellowship of Ames.
Hours M-Th, 1-5 and by appointment (515)450-6572.  They note you should make reservations for anytime in June.


This Thursday evening we'll be in Albia, Iowa, meeting with the Albia Quilt Guild.  We're presenting a trunk show and a talk on modern quilting!  If you're a member, we look forward to seeing you! 

Till Tuesday...

Tuesday, June 11, 2013

Riff on Recipe Cards, a Baby Quilt from the stash!


Marny here...just want to share my latest little project.  A baby quilt for a special little guy!

Last Thursday morning I got the itch to start and complete a baby quilt.  A little collection of fabric has been sitting in my stash for quite some time.  I ordered it from Monaluna fabrics years ago.  All three pieces are originally from her Monaco collection.  The circles and dots are still in that collection, and the scooters have been redesigned in a new collection.  

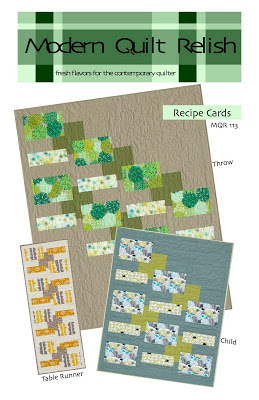
Rather than reinventing the wheel, putting a new spin on one of our patterns seemed like a fun challenge.  I love the table runner version of Recipe Cards.  The proportions are smaller than the child and throw sizes and suited the scale of my Monaluna pieces.  Luckily I had the three values necessary AND two yards of just the right green solid to dive in and get the quilt started!


This baby quilt is very different from the Recipe Cards pattern.  I didn't try to establish the diagonal seen in the quilts or the total symmetry of table runner.  This baby quilt uses a different layout.  I still wanted the illusion of layered rectangles though.  That is where the three values on a contrasting background comes into play.


The quilt completed. It is hard to see in this photograph, but the entire surface has been channel quilted.  I had never done it so extensively, and I learned some lessons along the way.  Even with my errors, I love how channel quilting looks!  The backing is a good quality flannel and the batting is Hobbs 80/20 fusible.  
For some reason, quilting from top to bottom, followed by bottom to top seemed like a good choice.  WRONG.  Can you see how the edges of the blue rectangle almost seem scalloped?  That is because when you stitch one direction and then the other it becomes a "push me pull you" situation and the fabric distorts between the stitching lines.  The remainder of the quilt was quilted one row at a time from top to bottom.  I didn't aim for perfection, in fact I purposely made the channels slightly different sizes, but all are about the width of the pressure foot.  It looks purposefully not perfect. 
  
Another little hiccup in the process was the binding.  There was not quite enough of the circle fabric in the aforementioned stash to complete the binding.  Inserting the green to fill the gap makes the edge just a little bit more interesting!
 
Close up of green inserted.  And the diagonal ends seem to run opposite directions, another hiccup.  But the resulting trapezoid is kind of interesting in itself.


Room for yet another hiccup? In writing the blog and looking at the photos I also made a mistake in transposing the layout from the pattern, oh well, it is still balanced, but not quite the way I intended.  I should have drawn it on graph paper like I usually do, but I was having too much fun pushing ahead with the fabric.  I actually cut the correct pieces and then decided they were wrong and "corrected".  Silly me.  Luckily the quilt still works and makes me happy!


Till next Tuesday...

Tuesday, June 4, 2013

Winners and the Des Moines Modern Quilt Guild Charity Block

Marny here...the winners of the Moda Layer Cakes were chosen using our random number generator. "Oink a Doodle Moo" by Jenn Ski goes to Doris and "Snap Pop" by Sandy Gervais goes to Deb.  The winners have been emailed.  Congratulations to our winners and a big thank you to all of you for your comments.  We loved reading and learning from them.
Three Herringbone blocks.  The left and right were made by Jill and the middle one is the one I made and is referred to below.

Jill and I are members of the Des Moines Modern Quilt Guild.  We are both participating in the Charity Quilt project for Hospice.  A herringbone block was chosen.  I've never made one before.  The process is intriguing.

You can find the tutorial on how to make the block on the Stitched in Color website (http://www.stitchedincolor.com/2011/12/herringbone-block-tutorial.html).  We were asked to use black, orange, white, and gray.  We were also advised to add a 15th strip on to the 14 strips the tutorial discusses.  I actually ended up with 16 strips because I just kept with the pairs concept.  This will all be more understandable if you go to the Stitched in Color link above.  

I am only showing you how I came up with my block, and not trying to provide a tutorial.  Rachel at Stitched in Color does a terrific job!

So, of course, I started by gathering fabrics together. 

Oranges in a variety of values, tints, tones and prints.

Grays, blacks and whites in a variety of values, tints, tones and prints. 

Checking how they work with one another.  Wild is ok! (I guess)

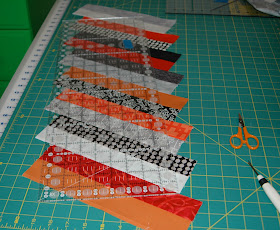
All the 2" x 11" strips cut and stirred into a pile so that I can choose randomly from them.

Chain pieced pairs sewn together.

Playing around with layouts on the design wall.

 Three pairs are already staggered and sewn together.  Another pair at the bottom of the photo is ready to be added.  Note, I used a ruler to measure in 1 1/2" on each one instead of making a mark of some kind.  This kept me moving, and movement is good!  

Here you see the previously sewn together pairs flipped onto the pair with the ruler shown above.  I pinched them, picked them up, and carried them to the sewing machine and stitched the seam without pins.  This is not a precision piecing project.

My ruler is 8 1/2" wide, so to do the six inch wide cut Rachel does in her tutorial, this is what I did.  You can see the "zero" edge of the ruler at the corner one pair makes with the next and the "6" mark at the edge of the bottom pair.

The right edge of the ruler is entirely on fabric.  First cut across the bottom of the ruler.  Second, cut alongside the entire length of the ruler along the right edge.

To make the next length of ruler cut I had to shift the ruler, keeping the bottom 1/2" line aligned with the bottom edge of the block and the 6" mark on the right edge of the block. 

A two ruler method proved useful here.  (Those who know me, know that I almost always use two rulers.)  Place a ruler along the left edge of the first ruler.  Then remove the first ruler and cut along the right length of the second ruler.  If you don't have two long rulers, you can carefully spin the project around on your mat.

All the stair stepped pointy edges cut off...and of course I fogot to take a picture of just that half of the Herringbone Block.  It is the left side seen below.

One Herringbone Block completed.  I didn't mean for the rust orange to meet in the middle, but something happened...you know how it goes...A word of warning.  This is a very stretchy block, with lots of exposed bias edges, so the less you handle it the better.
See you nest Tuesday.