SIMPLY SOPHISTICATED DESIGN WITH A TASTE OF THE UNEXPECTED.

Tuesday, December 30, 2014

Rif on Brioche and Baguette

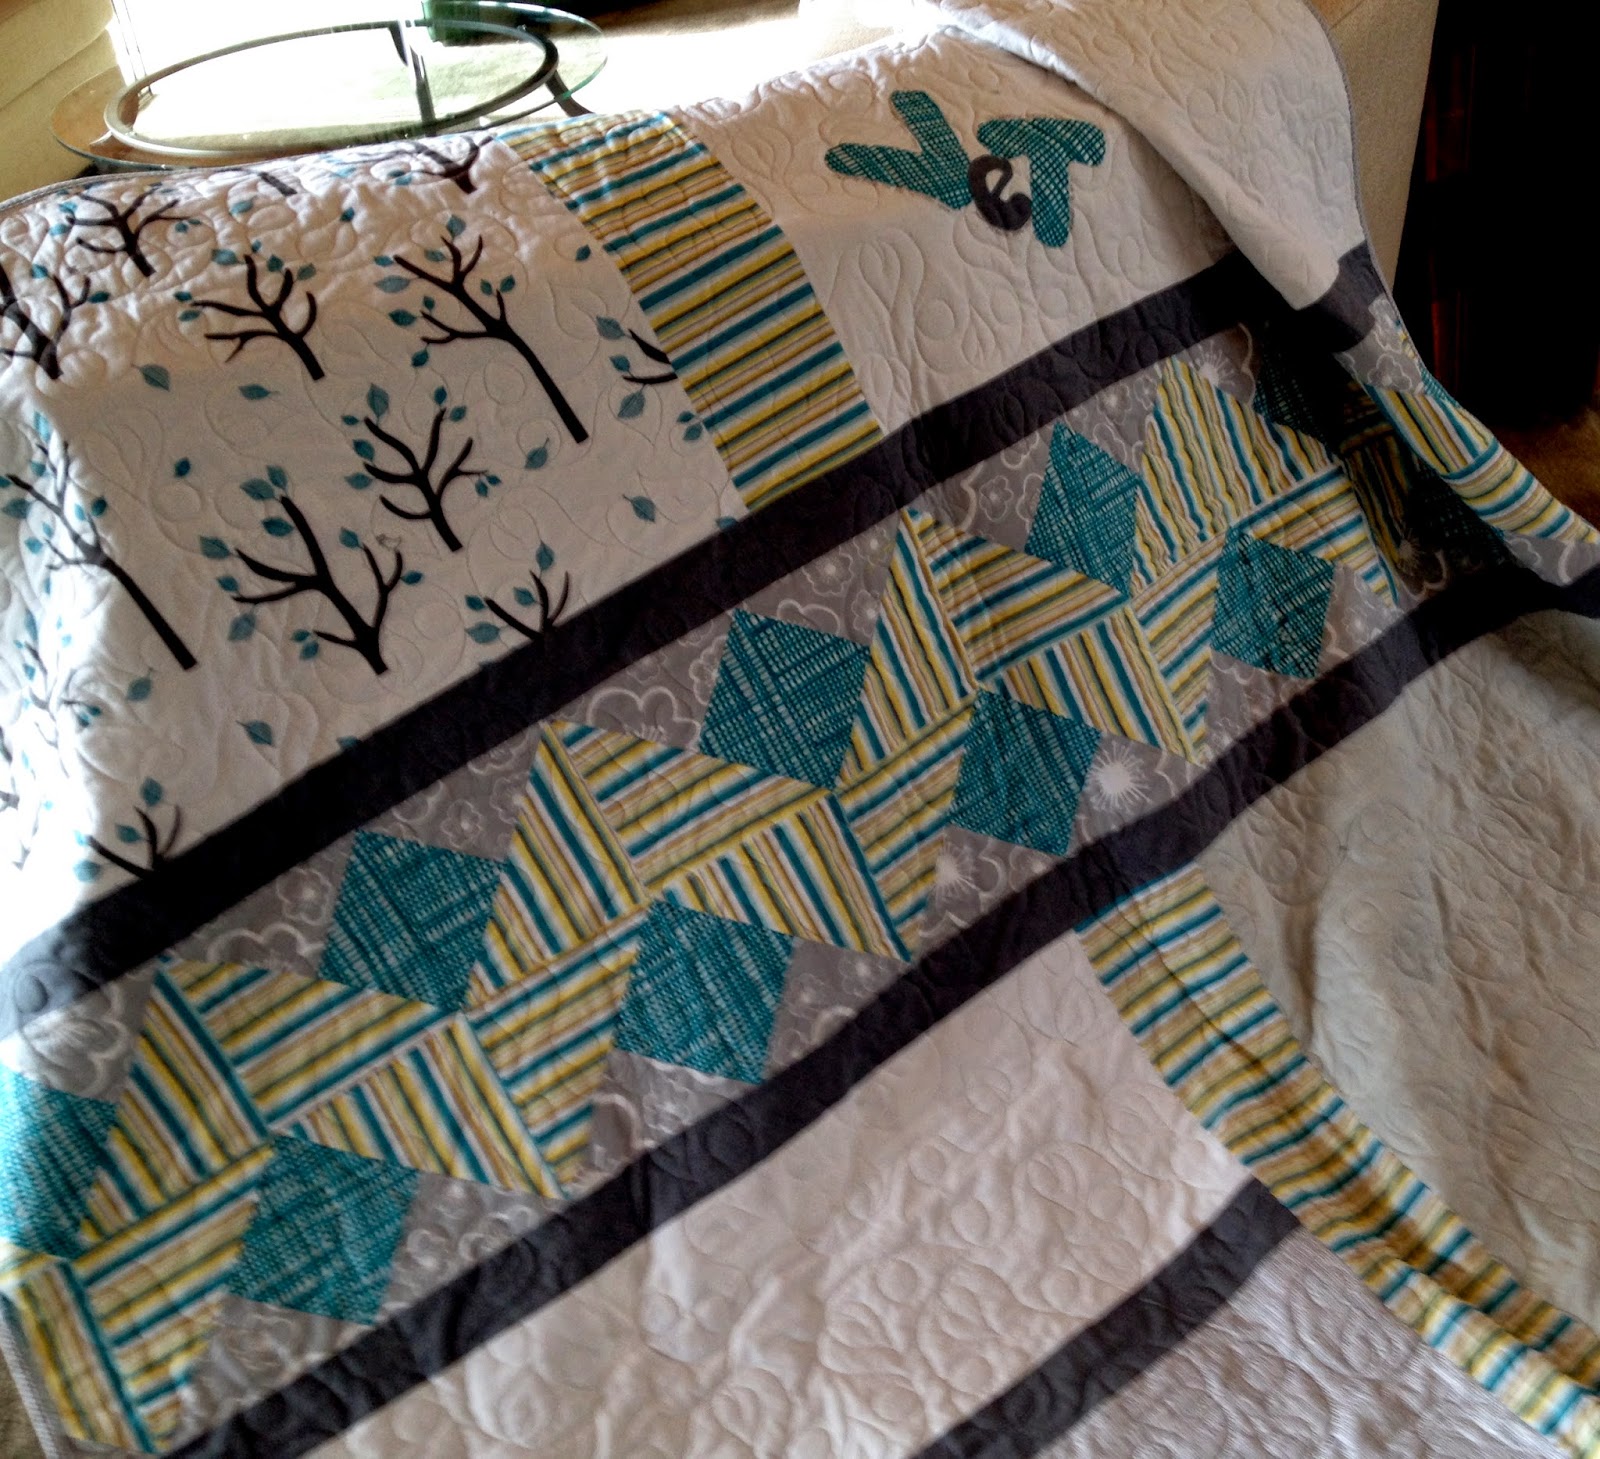
jill here...My oldest granddaughter just turned 2 and she needed a "big girl" quilt for her "big girl" bed!  We painted her bedroom a wonderful shade of gray (I say that because it was exactly the color we had envisioned and it covered in one coat!).  Living amongst the trees triggered a theme...one that would hopefully fulfill her decorative desires for more than just a few years (sorry Elsa and Anna).  I chose Lotta Jansdotter's "Bella" print from Windham Fabrics. It's a modern combination of fanciful organic shapes/patterns in white, gray, and aqua.  The little gray check was the perfect nondirectional pattern for the background.

The tree print was the theme with the grey check as background.  Four additional prints in the collection supplied the accoutrements.


The drawn plan is based on our Brioche and Baguette pattern.  The proportions work well, they just had to be adjusted for a double bed sized quilt.  I wanted the larger focus print to run both vertically and horizontally for more action while the squares are pops of smaller scaled prints.


The large scaled print portions were cut from adjacent sections so that the print reads succinctly.


The backing provides another quilt opportunity: Two for One!  Leftovers plus some additional yardage created a second option.


Half square triangles mingle with contrasting stripes to create a horizontal chevron.  Fun and easy! 


A viney leaf print quilted the layers together.  Amy Messenbrink added her special touch with the "Leaves" quilting pantograph!


An appliqued monogram (with essential documentation written in permanent pen) makes the gift complete. No more worries of a hand sewn quilt label.  Once the binding was finished, it was delivered to the birthday girl!

We're hoping  the new year brings you lots of quilting time...with many happy memories!  

'till 2015....

Tuesday, December 23, 2014

A Fine Family Holiday Tradition

Family traditions are wonderful! Participating, anticipating, and sharing the event/work are key to family traditions. One of our traditions is making six batches of sugary spice nuts and bagging them up in sacks I've sewn from the cutest Christmas fabric I can find each year and sharing them with family, co-workers and friends.
Spiced Nut Bags ready to share


Luckily it looks so much cuter filled with tasty nuts.


Gathering the supplies.

Three of six batches

Apportioning the tasty treats.

Time to send the bags near and far!
They resemble miniature Santa bags in more ways than one!

May your holidays be filled with your own traditions
 shared with family and friends.


Till Tuesday!

Tuesday, December 16, 2014

School of Sewing Provides Holiday Instruction


jill here...What a pleasure to sew a holiday gift from a quilter friend's new book School of Sewing.  Shea Henderson has authored a great resource of 12 beginner projects: "Learn It, Teach It, Sew Together".  Not only projects, the book is filled with sewing instructions for those who are beginners to the sewing world. And a good review for those who have sewn a long time!  It's skill builder lessons with the final project sewing a half square triangle quilt.  I will be gifting a couple of the books for a grandmother/granddaughter team and one for my daughter-in-law.


The rufflled wristlet key fob, designed by Alex Ledgerwood, had just the right attributes of challenge and panche for our annual get together. This little key ring is bright enough to be spied inside the purse... without settling to the bottom!


Here's a visual of the  book displayed with all the different fabric versions  Each guest chose their own combinations.

Marianne was our chef, serving another wonderful meal.

Marny and Jane created laughter while they gathered.


Laura proudly displayed her finished key ring.


Sue and Gale had time for conversation while they sewed.


Seven little rings all in a row.

Life gets busy so it's really fun to share an annual holiday project.  We made a space to gather and celebrate friendship.

'till next Tuesday...


Tuesday, December 9, 2014

Super Simple Paper Pieced Santa


Marny here…with a simple little project with so much potential. This little santa can be used for a pillow, pocket on a bag or apron, add on for bibs or baby onesies, part of a stocking, etc. You get the idea! Let's get started.


A 5'' x 6'' inch rectangle drawn in pencil on printer paper.
The top and bottom points are at the center 2 ½'' mark. 

Fabric scraps of white (beard), pink (face), red (hat & coat), 
and background (here cream with red).

Start paper piecing from the center out. 
Note the first two fabrics are lined up with edges fairly even with one another, 
right sides together, at least ¼'' above the line between beard and face, on the back of the pattern. You can just barely see the lines of the pattern through the paper in this photo. 
Hold tight or pin and flip the entire unit over to stitch from the front side.
REMEMBER, EACH TIME YOU ADD A FABRIC, CHECK THAT IT WILL COVER THE PORTION IT IS MEANT TO COVER.
PRESS AND TRIM (instructions follow) AFTER EACH SEAM.

Stitch from the right side with a reduced stitch length. Using a shorter stitch makes it easy to rip off the paper at the end of the project.

Working from the back side, fold the paper out of the way along the stitch line and trim the two fabrics just sewn ¼'' away from that stitching line.

Beard, face and hat sewn. Notice they are not trimmed to the actual shapes.  This will happen as the next fabrics are stitched on, one at a time.

The whole unit can be held up to a window or light to ballpark where the next fabric should be placed to the back. Again, all stitching is from the front of the pattern.

Coat added next

Final paper pieced background pieces added.


The entire unit is trimmed ¼'' away from the original outer edge.


Paper removed and Santa appears!


Little stripe border added top and bottom, left and right sides.
The stripe was cut ¾'' wide.
A little stitching for eyes and blush for the cheeks and this Super Simple Santa is ready for the holidays!
Till Tuesday…

Tuesday, December 2, 2014

International Quilt Festival Exhibits

Our recent adventure to Houston's International Quilt Festival allowed us a little time to enjoy the special exhibits.  Ruby Jubilee: A 40 Year Celebration was inspired by the 2011 Red and White exhibit in New York.  The quilts, made from 1974 to the present, were dramatically displayed from a radial overhead "mobile".  The quilts' scale in the vast overhead space was quite impressive. The red and white contrast made the display very graphic and harmonious.


The following quilts are just a few from the "Modern Quilt Guild Showcase 2014".  We strive to give appropriate credit to the designers; these photos are only to be viewed from our site, not to be reproduced.


The numerous exhibits included inspiration for every type of quilter.  Add the show to your list!

'Till next Tuesday,  stay warm and snuggle under a quilt!

Tuesday, November 25, 2014

Make a Lined Drawstring Bag for gift giving!

Marny here…our DSMMQG had it's yearly November social meeting last week.  We exchange seasonal gifts using the tried and true "steal a gift technique". It was lots of fun! 

First, what I took to give
What's in the bag?

I made a drawstring bag to present my contribution using my purchased Jeni Baker's Lined Drawstring Bag pattern. The size was customized according to Jeni's instructions.
Checkout Jeni's great online tutorial here!
It seemed appropriate to select truly seasonal fabrics from my stash. Iowa, like much of the country, has already had snow(s)! We've definitely brought out mittens, scarves and hats.
I have had this bodkin for many years. I love it! It is so useful for pulling drawstrings, elastic, ribbons or whatever through a casing. 
Plus it is a fun word to pronounce.
A bodkin makes a great stocking stuffer for the sewists in you family!
If you go looking for one, you have two choices. One is a needle with a large eye. Mine is the other sort built on a tweezer concept. It has teeth on one end that you clamp onto the ribbon (by sliding the ring down till tight). 
Here is the adorable "what" that was in the bag!
I wish I could say that I made this cute (store bought) snowman!
Don't you love his shaggy texture?
Again with the mittens, scarves and hats!
Now, let me share the special gift I received at the exchange…
Look at this wonderful little pillow! Doris Brunette of Row House Creations made this using reverse appliqué and a hand stitched accent line! I love looking through the snowflake at a moment captured in time! 
Looks like it is going to be a long, cold winter. This little pillow will brighten my home! Thinking about the kind and generous members in our guild warms my heart!

Till Tuesday…